If you ship your bike somewhere, you prefer that it arrives there in good condition. This is a way to ensure that. Packing your bike in a box this way is a way to travel by plane without buying a specialty bike case or hard-bottom bike bag and still have your bike arrive undamaged.
- Find the right bike box. Bike shops constantly dispose of bike boxes, so they will generally be a willing source for a box. Ask the bike shop for a box well ahead of time in case they only have boxes too small for your bike because they are building up only BMX bikes or other small bikes on the day you need the box.
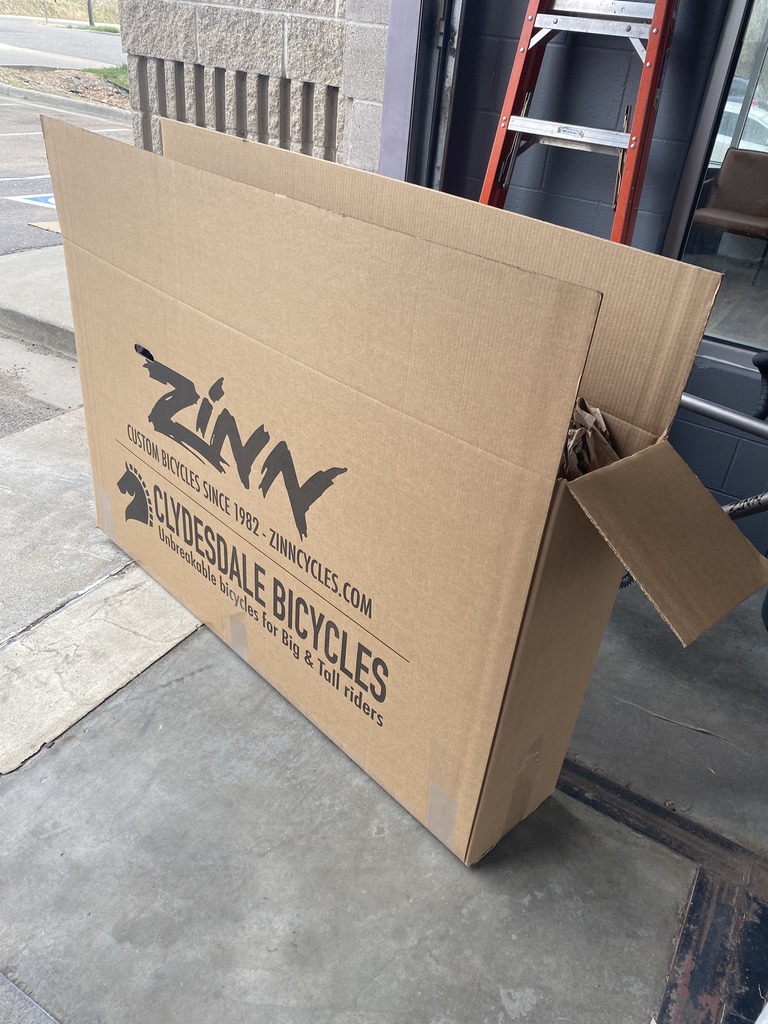
If your bike is tall, it likely won’t fit in a box you find at a bike shop; in that case, ShipBikes sells XL boxes that are folded down small enough to be shipped. Local customers (since we can’t ship them) can come by our shop in Louisville, CO and buy one of our custom triple-wall Zinn/Clydesdale bike boxes for tall bikes. They come folded flat to 71” X 55” (180cm X 147cm) and will fit into an SUV or a mid-size station wagon and are too wide for small cars. The dimensions of our bike boxes when packed is 60x13x34″.

Look for a triple-wall box of the right size for your bike. What’s that? When you look at the edge of a triple-wall box’s flaps, rather than seeing a layer of wavy (corrugated) paper sandwiched between two flat layers of paper (three total layers) like in a standard corrugated-cardboard box, you will instead see two corrugated layers with a flat layer of paper between them and flat external paper layers sandwiching the entire thing (five total layers). See step 4 for sizing the box.
Bike shops are also generally happy to give you packing materials that came with new bikes, like spacers for the fork and rear end (if you will ship it with the rear wheel off), protective plastic discs for the ends of the hub axles to prevent them from popping through the sides of the box, a plug or cap for the top of the seat tube, and miscellaneous padding, foam blocks, etc. to protect the bike. You can also purchase pipe insulation from a hardware store which are good for protecting frame tubes and can be easily re-used.
- Remove the pedals.
- Remove the wheel(s). See step 4 for deciding to remove both wheels or only the front wheel.
- Check the size of the bike box. Whether you are going to pack the bike with both wheels off or only the front wheel off depends on the size of your bike and on the box you can find. With a big bike, you may not be able to find a box long and/or tall enough to fit the bike with the rear wheel installed. Other reasons for removing both wheels might be if you are boxing it up to put in a shipping container, moving trailer, private vehicle, or private airplane or boat whose storage space limits the dimensions of the box.
With the rear wheel removed, the box can be shorter in both height and length than one that will fit your bike with the rear wheel on, but it must be correspondingly wider to fit both wheels alongside the frame. If your bike has an integrated seat mast, you will need a taller box than for a bike of the same size with a removable seatpost. Also, if you have an integrated stem/handlebar, removing the handlebar will not be an option, so the bike is going to need to fit in the box with the handlebars on, turned at 90 degrees; the box will have to be quite wide to also allow clearance for the forward-protruding brake levers.
With the box on its side, lay your bike atop it, rear wheel (or rear dropouts) along the bottom toward one (rear) corner. Turn the handlebars 90 degrees so the fork sits flat with its ends down at the front bottom corner of the box. If anything sticks out beyond the box, you need a bigger box.
- Install spacer(s) and protect the top of the frame. This and the next 10 or so steps are most easily done with the bike clamped by the seatpost in a bike stand; it can all also be done on the floor. Install a spacer between the fork ends, making sure it fits tightly and won’t pop out if the box is hit hard from the bottom; tape it in if need be. If you are packing it with the rear wheel off as well, install a spacer between the rear dropouts, securing it equally well. Lacking plastic spacers from the bike shop, cut your own out of wooden dowel and tape it (them) in. Wrap the top tube and down tube in bubble wrap or the like. Split cardboard tubes can also work.
- Remove or rotate the handlebar from/in the stem. This will not be possible with an integrated stem/handlebar (see step 4, above). Loosening the stem bolts clamping the handlebar so it can rotate down and its hooks can wrap around the top tube is the simplest solution for ease of assembly later. But if the box is not long enough for the one side of the handlebar to be extending so far forward, remove the handlebar from the stem clamp.
- Zip-tie the handlebar to the top tube. You can also use tape or string.
- Remove the rear derailleur. This protects the derailleur and the derailleur hanger from damage f if the box gets bashed in that area during transport. Understanding that the derailleur will tend to get twisted around with the chain in shipping, leave it dangling on the chain, wrapped in bubble wrap, and tuck it in alongside the bike (or between the chainstays if you removed the rear wheel).
- Partially deflate the tires. This is preventative for being in hot vehicles in the sun more than for altitude change when flying. Having moderate air pressure in them offers protection, and, if they are tubeless, prevents the tire beads from dislodging, making re-inflation a pain.
- Remove quick-release skewer(s) from the removed wheel(s). The axle will already be out with a through axle and disc brake. Unscrew and remove the skewer, nut, and springs from any wheel that is not left installed in the bike.
- Cover the axle end(s). Plug plastic protector discs that come with boxed-up new bikes into the axle ends, at least on the axle end against the box side so the axle won’t punch through the wall.
- Remove or protect disc-brake rotor(s). Skip this step with rim brakes. If leaving the rear wheel installed, leave its rotor on. The surest way to prevent a rotor from getting bent in transport is to remove it. Otherwise, using one of the huge, round, plastic rotor protectors that new bikes sometimes come shipped with, and/or securing the wheel to the bike with the rotor toward the frame and not contacting anything will usually suffice.
- Wrap all frame tubes. Tape bubble wrap, foam, or cardboard around all frame tubes, crankarms, and chainrings.
- Drop the bike into the box. The seatpost should be the only thing sticking out. If you removed the rear wheel, put something substantial under the chainring(s), because it (they) will be sitting on the bottom of the box. A small, taped-closed, cardboard box under it or multiple small pieces of cardboard taped to the bottom of the box under it should to the trick.
- Fit the wheel(s) in alongside. Move the frame to one side and find void space for the wheel(s). If there’s room, put a piece of cardboard between the wheel(s) and the frame. Zip-tie the wheel(s) to the frame (punch holes for the zip ties in the cardboard you put between them). Make sure that the axle end and/or rotor that points inward is not touching the frame.
- Pull the bike back out and tidy it up. Secure the wheel(s) and handlebar in place with multiple zip ties.
- Slide the bike back down into the box.
- Remove the seatpost. Tape a pad over the top of the seat tube.
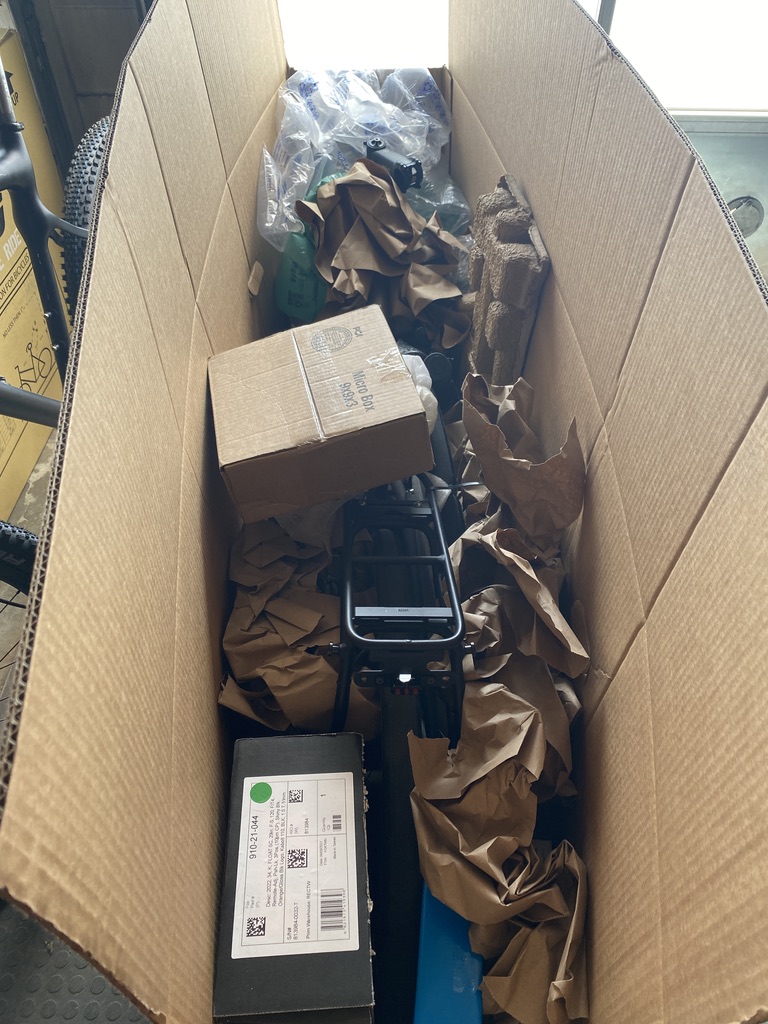
- Stow the small parts. Wrap up and pad the seatpost and slide it, saddle attached, down alongside the bike or under the down tube where there is space for it. Put pedals, skewers, through axles, rotor(s)—if removed, bottles, pump, spare tire bag, etc. into a bag or small box and fit it where there is space under the bike. Again, bag the rear derailleur.
- Pad the voids. Fill the spaces around the bike with air-filled packing pillows, wadded-up newspaper or packing paper, small cardboard boxes, etc., making it nice and snug so it won’t move around if the box is dropped. Tape a business card or other contact information for you to the top of the padded bike. For added security, tape an Apple Air Tag or other GPS tracker to the bike as well so you can figure out where it is if it gets lost in shipping.
- Tape the box up tight. Close the flaps and tape them down all around with packing tape. Tape the shipping label, if applicable, and your return address to the top of the box. Turn the box over and tape the bottom well if it is not already. Often, the tape on the bottom has been damaged in the box’s previous life; it’s not unprecedented for the bottom of a used box to open during shipping and drop the bike out.
- Create and print your label using shipbikes.com for the best rates. For international shipping use Luggagefree.com
That’s it!
As a frame builder, Lennard Zinn has been designing and building custom bicycles for over 42 years; he founded Zinn Cycles in 1982 and co-founded Clydesdale Bicycles in 2017. His Tech Q&A column on Substack follows his 35-year stint as a technical writer for VeloNews (from 1987 through 2022). He is a former U.S. National Cycling Team member and author of many bicycle books including Zinn and the Art of Mountain Bike Maintenance, Zinn and the Art of Road Bike Maintenance, and The Haywire Heart. He holds a bachelor’s degree in physics from Colorado College.
Follow Lennard Zinn on Substack, Strava, X, Instagram, LinkedIn, or Facebook.


